MVC
ASP.NET Core MVC로 글 작성으로 첨부 파일 올리고 다운로드 가능하게 하기
알럽유
2024. 8. 7. 10:43
728x90
오늘은 사진과 같이 글 작성을 하면서 파일 업로드 & 다운로드를 할 수 있는 방법에 대해서 알려드리겠습니다.
PostPage
<div class="Main-container">
    <h2 class="h2">새 게시글 작성</h2>
    <div class="container">
        <form asp-action="PostPage" method="post" enctype="multipart/form-data">
            @Html.AntiForgeryToken()
            <div class="form-group">
                <label asp-for="Title" class="label">제목</label>
                <input asp-for="Title" class="input" id="Title" />
                <span asp-validation-for="Title" class="text"></span>
            </div>
            <div class="form-group">
                <label asp-for="Content" class="label">내용</label>
                <textarea asp-for="Content" class="textarea" id="Content"></textarea>
                <span asp-validation-for="Content" class="text"></span>
            </div>
            <div class="form-group">
                <label asp-for="Author" class="label">작성자</label>
                <input asp-for="Author" class="input" id="Author" />
                <span asp-validation-for="Author" class="text"></span>
            </div>
            <div class="form-group">
                <label for="uploadedFile" class="label">파일 업로드 (필수 사항)</label>
                <input type="file" name="uploadedFile" id="uploadedFile" class="input" />
                <span asp-validation-for="Filepath" class="text"></span>
            </div>
            <div class="form-group">
                <input asp-for="IsPopup" type="checkbox" id="IsPopup" />
                <label asp-for="IsPopup">팝업창으로 만들기</label>
            </div>
            <button type="submit" class="btn btn-primary">작성</button>
        </form>
    </div>
</div>
글작성 화면입니다. 파일 업로드를 위해 multipart/form-data 인코딩 타입을 사용합니다.
글작성 Controller
[HttpPost]
[ValidateAntiForgeryToken]
public async Task<IActionResult> PostPage(Noticeboard post, IFormFile uploadedFile)
{
    if (ModelState.IsValid)
    {
        try
        {
            if (uploadedFile != null && uploadedFile.Length > 0)
            {
                // 파일 확장자 검증 추가
                if (!FileHelper.IsValidFileExtension(uploadedFile.FileName))
                {
                    ViewBag.ErrorMessage = "Invalid file extension.";
                    return View(post);
                }

                var safeFileName = FileHelper.MakeSafeFilename(uploadedFile.FileName);
                var filePath = Path.Combine("wwwroot/uploads", safeFileName);
                using (var stream = new FileStream(filePath, FileMode.Create))
                {
                    await uploadedFile.CopyToAsync(stream);
                }
                post.Filepath = "/uploads/" + safeFileName;
                post.Filename = safeFileName;
            }
            else
            {
                post.Filepath = string.Empty;
                post.Filename = string.Empty;
            }

            post.Date = DateTime.Now;
            post.Views = 0;
            await _crudService.CreatePostAsync(post);

            if (post.IsPopup)
            {
                var popupUrl = Url.Action("Popup", "Announcement", new { postId = post.Id });
                if (string.IsNullOrEmpty(HttpContext.Session.GetString("PopupUrl1")))
                {
                    HttpContext.Session.SetString("PopupUrl1", popupUrl);
                    Response.Cookies.Append("PopupUrl1", popupUrl, new CookieOptions { Expires = DateTimeOffset.UtcNow.AddDays(1) });
                }
                else if (string.IsNullOrEmpty(HttpContext.Session.GetString("PopupUrl2")))
                {
                    HttpContext.Session.SetString("PopupUrl2", popupUrl);
                    Response.Cookies.Append("PopupUrl2", popupUrl, new CookieOptions { Expires = DateTimeOffset.UtcNow.AddDays(1) });
                }
                else
                {
                    HttpContext.Session.SetString("PopupUrl3", popupUrl);
                    Response.Cookies.Append("PopupUrl3", popupUrl, new CookieOptions { Expires = DateTimeOffset.UtcNow.AddDays(1) });
                }
            }

            return RedirectToAction("ManagerList");
        }
        catch (Exception ex)
        {
            ViewBag.ErrorMessage = "Error creating post: " + ex.Message;
        }
    }
    else
    {
        ViewBag.ErrorMessage = "ModelState is not valid: " + string.Join("; ", ModelState.Values
                .SelectMany(x => x.Errors)
                .Select(x => x.ErrorMessage));
    }
    return View(post);
}
컨트롤러에서는 폼에서 전송된 데이터를 받아서 파일을 서버에 저장하고, 데이터베이스에 파일 경로 정보를 저장합니다.
파일 확장자 검증
파일 확장자를 검증하여 특정 파일 형식만 허용하도록 할 수 있습니다.
FileHelper.cs
using System;
using System.IO;
using System.Linq;

namespace noticeboard.Helpers
{
    public static class FileHelper
    {
        public static string MakeSafeFilename(string filename)
        {
            var invalidChars = Path.GetInvalidFileNameChars();
            return string.Concat(filename.Select(ch => invalidChars.Contains(ch) ? '_' : ch)); // 유효하지 않은 문자는 언더스코어('_')로 대체
        }

        public static bool IsValidFileExtension(string filename)
        {
            var allowedExtensions = new[] { ".jpg", ".jpeg", ".png", ".pdf" };
            var extension = Path.GetExtension(filename).ToLowerInvariant();
            return allowedExtensions.Contains(extension);
        }
    }
}
이 메서드는 파일 이름을 입력받아 안전한 파일 이름으로 변환하여 반환합니다.
- Path.GetInvalidFileNameChars():
- 이 메서드는 파일 이름에 사용할 수 없는 문자의 배열을 반환합니다. 예를 들어, Windows에서는 \, /, :, *, ?, ", <, >, |와 같은 문자들이 유효하지 않습니다.
- filename.Select(ch => invalidChars.Contains(ch) ? '_' : ch):
- filename 문자열의 각 문자를 순회하며, 그 문자가 유효하지 않은 문자인지 검사합니다.
- 만약 유효하지 않은 문자라면, 해당 문자를 언더스코어('_')로 대체합니다.
- 유효한 문자라면 그대로 유지합니다.
- string.Concat(...):
- 변환된 문자들을 연결하여 새로운 문자열을 만듭니다.
- 파일 확장자 검증 - 파일 확장자를 검증하여 특정 파일 형식만 허용하도록 할 수 있습니다.
이 FileHelper는 constroller에 잘 사용되고 있습니다.
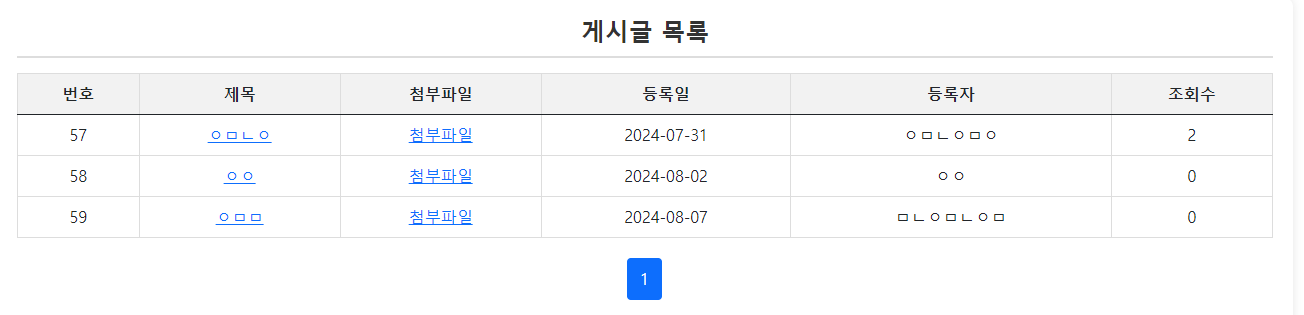
그리고 마지막 리스트 페이지입니다.
@model X.PagedList.IPagedList<noticeboard.Models.Noticeboard>
<link rel="stylesheet" href="~/css/Announcement/List.css" asp-append-version="true" />
@using X.PagedList.Mvc.Core

@{
    ViewData["Title"] = "ListPage";
}

<div class="Main-container">
    <h2 class="h2">게시글 목록</h2>

    @if (Model == null || !Model.Any())
    {
        <p>게시글이 없습니다.</p>
    }
    else
    {
        <table class="table">
            <thead>
                <tr>
                    <th>번호</th>
                    <th>제목</th>
                    <th>첨부파일</th>
                    <th>등록일</th>
                    <th>등록자</th>
                    <th>조회수</th>
                </tr>
            </thead>
            <tbody>
                @foreach (var post in Model)
                {
                    <tr>
                        <td>@post.Id</td>
                        <td>@Html.ActionLink(post.Title, "Details", new { id = post.Id })</td>
                        <td>
                            @if (!string.IsNullOrEmpty(post.Filepath))
                            {
                                <a href="@Url.Action("DownloadFile", "Announcement", new { filePath = post.Filepath, fileName = post.Filename })">첨부파일</a>
                            }
                        </td>
                        <td>@post.Date.ToShortDateString()</td>
                        <td>@post.Author</td>
                        <td>@post.Views</td>
                    </tr>
                }
            </tbody>
        </table>
        <div>
            @Html.PagedListPager(Model, page => Url.Action("ListPage", new { page }), new PagedListRenderOptions
   {
       UlElementClasses = new[] { "pagination" },
       LiElementClasses = new[] { "page-item" },
       PageClasses = new[] { "page-link" }
   })
        </div>
    }
</div>