ASP.NET Core MVC 모델로 팝업창 띄우기
2024. 8. 7. 09:59ㆍMVC
728x90
지금 부터 팝업창 띄우는 방법을 알려드리겠습니다
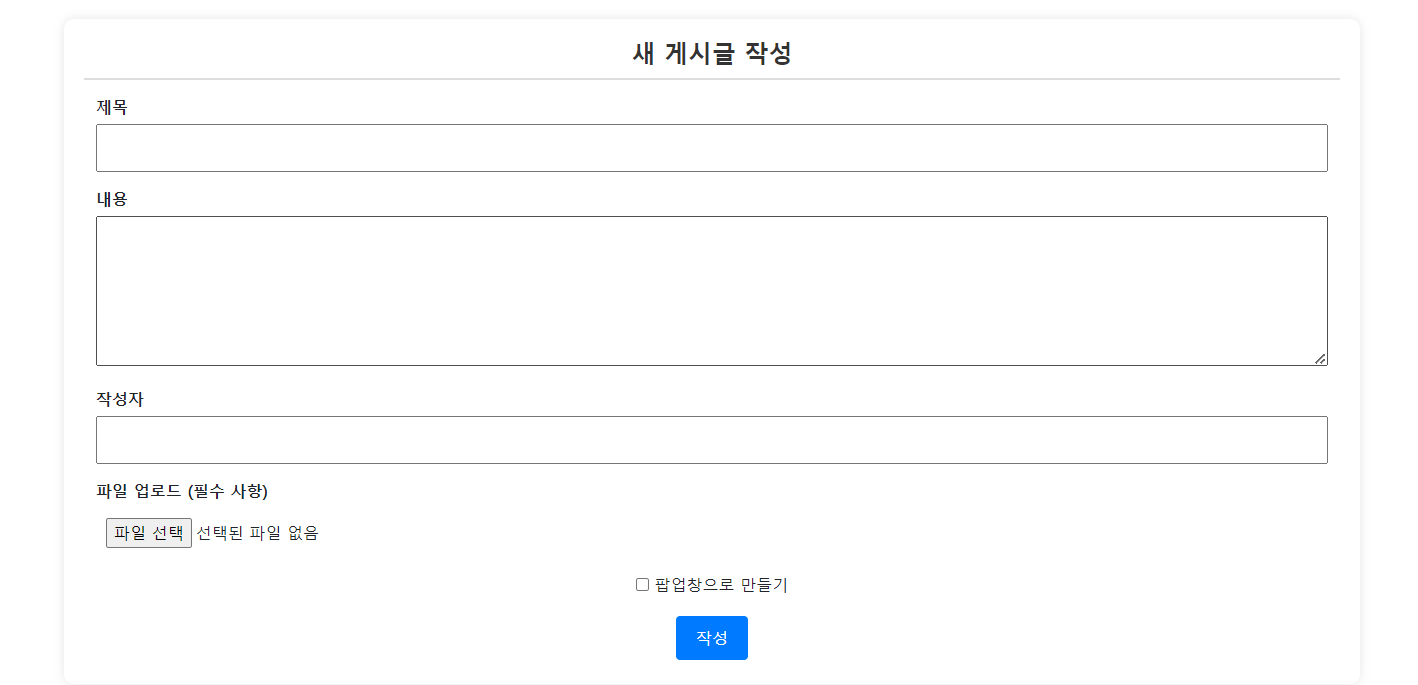
사진과 같이 글작성 페이지에 팝업창으로 만들기라는 버튼을 클릭시

홈화면에 가게 되면 해당 글의 팝업이 띄어지는 것을 볼 수 있습니다.
이 기능에 대해서 알려드리겠습니다.
글작성 페이지
@model noticeboard.Models.Noticeboard
<link rel="stylesheet" href="~/css/Announcement/Post.css" asp-append-version="true" />
@{
    ViewData["Title"] = "새 게시글 작성";
}

<div class="Main-container">
    <h2 class="h2">새 게시글 작성</h2>
    <div class="container">
        <form asp-action="PostPage" method="post" enctype="multipart/form-data">
            @Html.AntiForgeryToken()
            <div class="form-group">
                <label asp-for="Title" class="label">제목</label>
                <input asp-for="Title" class="input" id="Title" />
                <span asp-validation-for="Title" class="text"></span>
            </div>
            <div class="form-group">
                <label asp-for="Content" class="label">내용</label>
                <textarea asp-for="Content" class="textarea" id="Content"></textarea>
                <span asp-validation-for="Content" class="text"></span>
            </div>
            <div class="form-group">
                <label asp-for="Author" class="label">작성자</label>
                <input asp-for="Author" class="input" id="Author" />
                <span asp-validation-for="Author" class="text"></span>
            </div>
            <div class="form-group">
                <label for="uploadedFile" class="label">파일 업로드 (필수 사항)</label>
                <input type="file" name="uploadedFile" id="uploadedFile" class="input" />
                <span asp-validation-for="Filepath" class="text"></span>
            </div>
            <div class="form-group">
                <input asp-for="IsPopup" type="checkbox" id="IsPopup" />
                <label asp-for="IsPopup">팝업창으로 만들기</label>
            </div>
            <button type="submit" class="btn btn-primary">작성</button>
        </form>
    </div>
</div>
게시글 작성 페이지로, 제목, 내용, 작성자, 파일 업로드 및 팝업 옵션을 입력받을 수 있습니다.
팝업창 화면
@model noticeboard.Models.Noticeboard

@{
    Layout = "_PopupLayout";
    ViewData["Title"] = "새 게시글";
}

<a href="javascript:void(0);" onclick="openFullScreen('@Url.Action("Details", "Announcement", new { id = Model.Id })')" class="h2">@Model.Title</a>
<p class="p">@Model.Content</p>

@section Scripts {
    <script>
        function closePopup() {
            window.close();
        }

        function openFullScreen(url) {
            var fullScreenWindow = window.open(url, '_blank', 'fullscreen=yes'); // 전체 화면 설정
            fullScreenWindow.moveTo(0, 0);
            fullScreenWindow.resizeTo(screen.width, screen.height);
        }
    </script>
}
팝업창 레이아웃으로, 게시글을 전체 화면으로 띄울 수 있는 기능
팝업이 띄어지는 화면 (홈 화면)
@model noticeboard.Models.Noticeboard

@{
    ViewData["Title"] = "Home";
    var popupUrl1 = ViewData["PopupUrl1"] as string;
    var popupUrl2 = ViewData["PopupUrl2"] as string;
    var popupUrl3 = ViewData["PopupUrl3"] as string;
}

<h2>Home</h2>

@section Scripts {
    <script>
        document.addEventListener("DOMContentLoaded", function () {
            var popupUrl1 = '@popupUrl1';
            var popupUrl2 = '@popupUrl2';
            var popupUrl3 = '@popupUrl3';
            if (popupUrl1) {
                window.open(popupUrl1, '_blank', 'width=400,height=300');
            }
            if (popupUrl2) {
                window.open(popupUrl2, '_blank', 'width=400,height=300');
            }
            if (popupUrl3) {
                window.open(popupUrl3, '_blank', 'width=400,height=200');
            }
        });
    </script>
}
홈 페이지에서 특정 URL을 팝업 창으로 띄우는 스크립트를 포함하고 있습니다.
그다음 세 개의 controllers를 보여드리겠습니다
우선
Home 컨트롤러
public async Task<IActionResult> Home(bool showModal = false, int postId = 0)
{
    try
    {
        Noticeboard post = null;
        if (showModal && postId > 0)
        {
            post = await _crudService.GetPostByIdAsync(postId);
            var popupUrl = Url.Action("Popup", "Announcement", new { postId = post.Id });
            TempData["PopupUrl1"] = popupUrl;
            HttpContext.Session.SetString("PopupUrl1", popupUrl);
            ViewData["PopupUrl1"] = popupUrl;
        }
        else
        {
            var popupUrl1 = HttpContext.Session.GetString("PopupUrl1") ?? Request.Cookies["PopupUrl1"];
            var popupUrl2 = HttpContext.Session.GetString("PopupUrl2") ?? Request.Cookies["PopupUrl2"];
            var popupUrl3 = HttpContext.Session.GetString("PopupUrl3") ?? Request.Cookies["PopupUrl3"];

            if (!string.IsNullOrEmpty(popupUrl1))
            {
                ViewData["PopupUrl1"] = popupUrl1;
            }

            if (!string.IsNullOrEmpty(popupUrl2))
            {
                ViewData["PopupUrl2"] = popupUrl2;
            }

            if (!string.IsNullOrEmpty(popupUrl3))
            {
                ViewData["PopupUrl3"] = popupUrl3;
            }
        }

        ViewBag.ShowModal = showModal && post != null;
        return View(post);
    }
    catch (Exception ex)
    {
        return Content($"Error fetching home post: {ex.Message} - {ex.InnerException?.Message}");
    }
}
홈 페이지를 표시하며, showModal 파라미터가 true이면 해당 게시글을 팝업으로 띄우기 위한 URL을 생성하고
세션 및 쿠키에 저장합니다.
그다음은
popup 컨트롤러
public async Task<IActionResult> Popup(int postId)
{
    try
    {
        var post = await _crudService.GetPostByIdAsync(postId);
        if (post == null)
        {
            return NotFound();
        }
        return View(post);
    }
    catch (Exception ex)
    {
        return Content($"Error fetching post for popup: {ex.Message} - {ex.InnerException?.Message}");
    }
}
특정 게시글을 팝업 창으로 표시합니다.
그다음
작성 컨트롤러
[HttpPost]
[ValidateAntiForgeryToken]
public async Task<IActionResult> PostPage(Noticeboard post, IFormFile uploadedFile)
{
    if (ModelState.IsValid)
    {
        try
        {
            if (uploadedFile != null && uploadedFile.Length > 0)
            {
                var safeFileName = FileHelper.MakeSafeFilename(uploadedFile.FileName);
                var filePath = Path.Combine("wwwroot/uploads", safeFileName);
                using (var stream = new FileStream(filePath, FileMode.Create))
                {
                    await uploadedFile.CopyToAsync(stream);
                }
                post.Filepath = "/uploads/" + safeFileName;
                post.Filename = safeFileName;
            }
            else
            {
                post.Filepath = string.Empty;
                post.Filename = string.Empty;
            }

            post.Date = DateTime.Now;
            post.Views = 0;
            await _crudService.CreatePostAsync(post);

            if (post.IsPopup)
            {
                var popupUrl = Url.Action("Popup", "Announcement", new { postId = post.Id });
                if (string.IsNullOrEmpty(HttpContext.Session.GetString("PopupUrl1")))
                {
                    HttpContext.Session.SetString("PopupUrl1", popupUrl);
                    Response.Cookies.Append("PopupUrl1", popupUrl, new CookieOptions { Expires = DateTimeOffset.UtcNow.AddDays(1) });
                }
                else if (string.IsNullOrEmpty(HttpContext.Session.GetString("PopupUrl2")))
                {
                    HttpContext.Session.SetString("PopupUrl2", popupUrl);
                    Response.Cookies.Append("PopupUrl2", popupUrl, new CookieOptions { Expires = DateTimeOffset.UtcNow.AddDays(1) });
                }
                else
                {
                    HttpContext.Session.SetString("PopupUrl3", popupUrl);
                    Response.Cookies.Append("PopupUrl3", popupUrl, new CookieOptions { Expires = DateTimeOffset.UtcNow.AddDays(1) });
                }
            }

            return RedirectToAction("ManagerList");
        }
        catch (Exception ex)
        {
            ViewBag.ErrorMessage = "Error creating post: " + ex.Message;
        }
    }
    else
    {
        ViewBag.ErrorMessage = "ModelState is not valid: " + string.Join("; ", ModelState.Values
                .SelectMany(x => x.Errors)
                .Select(x => x.ErrorMessage));
    }
    return View(post);
}
게시글을 작성하고 파일 업로드를 처리합니다.
IsPopup 옵션이 true이면 해당 게시글을 팝업으로 띄울 수 있는 URL을 생성하여 세션 및 쿠키에 저장합니다.
세션 및 쿠키 설정
if (string.IsNullOrEmpty(HttpContext.Session.GetString("PopupUrl1")))
{
    HttpContext.Session.SetString("PopupUrl1", popupUrl);
    Response.Cookies.Append("PopupUrl1", popupUrl, new CookieOptions { Expires = DateTimeOffset.UtcNow.AddDays(1) });
}
else if (string.IsNullOrEmpty(HttpContext.Session.GetString("PopupUrl2")))
{
    HttpContext.Session.SetString("PopupUrl2", popupUrl);
    Response.Cookies.Append("PopupUrl2", popupUrl, new CookieOptions { Expires = DateTimeOffset.UtcNow.AddDays(1) });
}
else
{
    HttpContext.Session.SetString("PopupUrl3", popupUrl);
    Response.Cookies.Append("PopupUrl3", popupUrl, new CookieOptions { Expires = DateTimeOffset.UtcNow.AddDays(1) });
}
팝업 띄우기 스크립트
@section Scripts {
    <script>
        document.addEventListener("DOMContentLoaded", function () {
            var popupUrl1 = '@popupUrl1';
            var popupUrl2 = '@popupUrl2';
            var popupUrl3 = '@popupUrl3';
            if (popupUrl1) {
                window.open(popupUrl1, '_blank', 'width=400,height=300');
            }
            if (popupUrl2) {
                window.open(popupUrl2, '_blank', 'width=400,height=300');
            }
            if (popupUrl3) {
                window.open(popupUrl3, '_blank', 'width=400,height=200');
            }
        });
    </script>
}
위의 코드를 통해 게시글 작성 시 팝업 설정을 할 수 있고,
설정된 게시글을 홈 페이지 로드 시 자동으로 팝업으로 띄우는 기능을 구현할 수 있습니다.
그리고 Models 폴더에 데이터베이스 정보를 넣어주세요
using System;
using System.ComponentModel.DataAnnotations;

namespace noticeboard.Models
{
    public class Noticeboard
    {
        public int Id { get; set; }

        [Required(ErrorMessage = "제목을 입력하세요.")]
        [StringLength(100, MinimumLength = 1, ErrorMessage = "제목은 1자 이상이어야 합니다.")]
        public string Title { get; set; }

        [Required(ErrorMessage = "내용을 입력하세요.")]
        [StringLength(500, MinimumLength = 1, ErrorMessage = "내용은 1자 이상이어야 합니다.")]
        public string Content { get; set; }

        public string? Filepath { get; set; }
        public string? Filename { get; set; }

        [Required(ErrorMessage = "작성자를 입력하세요.")]
        [StringLength(20, ErrorMessage = "작성자는 20자 이하이어야 합니다.")]
        public string Author { get; set; }

        public DateTime Date { get; set; } = DateTime.Now;

        public int Views { get; set; } = 0;

        public bool IsPopup { get; set; } = false;
    }
}
'MVC' 카테고리의 다른 글
| ASP.NET Core MVC로 글 작성으로 첨부 파일 올리고 다운로드 가능하게 하기 (2) | 2024.08.07 |
|---|---|
| ASP.NET Core MVC 모델을 이용해서 게시판 만들기 (4) Detail, Edit 페이지 만들기 (0) | 2024.07.30 |
| ASP.NET Core MVC모델을 이용해서 게시판 만들기 (4) Views, Models 폴더 (0) | 2024.07.18 |
| ASP.NET Core MVC 모델을 이용해서 게시판 만들기 (3) (0) | 2024.07.15 |
| ASP.NET Core MVC 모델을 이용해서 게시판 만들기 (2) (0) | 2024.07.15 |